Find Select Projects Easier

If you're looking for a specific project that I've done, please click here for a categorized list page.

Don't Forget To Leave A Comment

If an article interests you, please click below it where it tells the number of comments and leave one. I appreciate all input.

Get My Blog In Your Email

Enter your email address:

Delivered by FeedBurner

Sunday, June 30, 2013

A Doctor's Pen

I am going tomorrow morning to see a friend who is a doctor. All this week I've had ideas rambling around in my head for a pen design for me to take to him. I had these ideas of this wild design on a pen.
Then I went into the shop today to actually make the blank, and a thought entered my head as I was getting together material. This man is a doctor. If I make some wild looking pen, he may appreciate it, but it'll more than likely wind up in a desk drawer. A doctor is not going to carry around a pen that is going to catch every one's attention the moment he pulls it out of his pocket. I think a doctor would prefer a more simple, yet elegant pen.
It is the same walnut and box elder theme I've been working with lately. Instead of all kinds of crazy glued up pieces though, I decided on two simple rings glued in at a thirty degree angle. After completing it, I think this is much more fitting for a doctor than some of my crazier ideas.
.
I enjoy making all pens. However, after doing a simple pen, I like to go back to wild.
The last pen I posted yesterday, with the randomly glued in slices of box elder, seemed to get a good response from all who seen it. I wanted to do that again, but try a different material.
I used purple heart and box elder.
I added one more slice than I used on the pen from yesterday. Also, I varied the thickness of those slices.
I plan on making more pens in this style in the future. I realize there are so many variables to this design that change according to number of slices, thickness of those slices, angles of the slices, and also you could use more than just the two color contrast that I've done so far. The possibilities are endless. 

Saturday, June 29, 2013

Walnut And Box Elder

Today's is not a very long post. The title pretty much explains it all. I have somehow gotten on a walnut and box elder habit. I don't know why besides I like it. In my opinion, it is a beautiful combination of woods for some of my experimentation.
I've always loved walnut. However, before a friend of mine in Alabama sent me a few walnut pen blanks, I'd never had the chance to work with it as much as I have lately. The box elder came from a friend who lives in Indiana. The two woods together create a very nice contrast.
For my first pen today, some of my friends expressed like for the wavy patterned pen I attempted yesterday. So I tried it first.
It did not turn out exactly like the one I tried yesterday. No two pens are ever exactly alike. When you glue in strips like in this pen, you never know exactly how they'll turn out until you turn it. I still think it is a nice pen though. I think I'll play with this style some more in the future.
Next, if you seen the other blank I had clamped up in the vice when I finished yesterday, was a piece of walnut with two strips of elder running across each other at a steep end to end angle.
.
Now, after I drilled for and glued in the tubes in these blanks, I needed something to do while waiting for that to dry. So I took some more walnut and box elder and just started messing around. I did not plan on anything with this next pen. I simply started slicing it on the band saw. Then I glued in a strip and let it sit while I turned the first pen. Anytime I had a break, like while waiting on a coat of CA glue to dry for example, I'd slice and glue in another strip. I just wanted to see how it would turn out.
I think interesting is the best way I could describe how it turned out. 

Friday, June 28, 2013

Not My Best Day

If you read my last blog entry, I had left one set of pen blanks curing with the tubes glued in, and another full length blank clamped up in a bench vice. I was anxious this morning to see how they would turn out.
Let's start with the rubbery black pipe blanks.
I did in fact get a pen turned out of this material. I must say it was a challenge. Almost nothing I tried worked on this stuff. It is softer than the corian and peeled off rather easily. It peels off so much, in fact, that I had to stop the lathe often to tear the streamers of black rubbery material from around the mandrel shaft.
I experimented as I went along because I did not want to get down to the final pen size and run into surprises. I learned right off that you cannot sand this material. Sanding, even with the finest of grits, leaves more scratches than it takes away. Sanding around it with the lathe running and then the length, like I would do for most material, simply leaves a crosshatch pattern. It does nothing to smooth it.
Next, I tried something a friend suggested. I removed the blanks from the lathe and popped them in the freezer for a while. The thought is that the cold will harden the blanks and make them more workable. This presented a new problem. The tubes are metal based. Metal contracts when it is cold. The freezing of the blanks also shrunk the tubes enough that I could not get them on the mandrel shaft.
Next, I tried different turning tool. Since I was not going to be able to sand this stuff, I needed as fine a finish as I could get straight from the cutting of the tools.
The gouge left a terrible finish. The scraper simply dug in the softer than wood material. Eventually, I settled on the fact that I was going to have no choice but to turn this entirely with a skew chisel. While this is great practice with a skew, it also proved that I also need a lot more practice to get better than I am now.
Anyway, with the pen complete, I liked working with this material. It presented a challenge, and I like challenges. The finish is no where near as smooth as I would normally like, but I think that, and knowing what it was originally, adds to the originality of this pen.
I will revisit this material at a later date. Also, the same friend who gave me this has some other pipe, grey I believe, that I will have to get some of to try.
Next came the walnut and box elder blank I left clamped in the vice yesterday. I turned it, and it was shaping up to be one of the nicest pens I'd done in a while. I absolutely love the look of these finished blanks.
Then I started pressing everything together.
Now let me tell you something about me. I can stop a project at a good stopping point. If for any reason though I ever stop a project in the middle of an important step, something usually goes wrong when I return to it. Therefore, I hate, with a passion, having to stop on anything if I am not at a good common sense stopping point.
So anyway, with that explained, I was just starting to press the parts together when I got a phone call. My son's truck was broke down on the side of the highway. Ordinarily, that would mean I would finish pressing the parts together and then go help him. However, with a hundred degree heat index, and my son having his pregnant wife who is eight months pregnant with my grandchild in the truck with him, I had to go that very instant.
It turned out that he had a blown tire. His spare was flat. I drove him around to find a replacement tire while my wife carried his pregnant wife back to our place. With the truck back in commission, I returned to the pen.
Do you remember what I said about something usually going wrong if I stop on something the way I had to do? The advance mechanism somehow got cocked while being pressed. By the time I realized it, it had bent. I tried straightening it. It made it worse. I tried pulling it back out and using a different one, since it wasn't deep. It broke flush with the pen blanks. I used pliers to remove the nib (I had a replacement) and tried tapping the mechanism out using a punch. The blank slipped in the soft jaws and completely ruined it.
So my beautiful pen was ruined.
What to do?
Well I glued up another one to try again, of course.
I also left another blank clamped up. This is just another one of my weird ideas. We'll have to see how both of these turn out next time.
Hopefully, next time will prove to be a better day than today.

Thursday, June 27, 2013

Back Away From The Crazy

Have any of you ever noticed that when things start going wrong, they keep going wrong? For me, once it starts, it keeps going until I just all of a sudden have a victory, or I back it up a bit. Since the failures keep coming, I figured it was time to throw it in reverse. What do I mean by that?
I have a tendency to want to do things that are challenging. Some may argue that I sometimes even push the envelope too much, too quickly, on things. I'm not saying that's a bad thing. I know from experience though that this makes me sometimes need to back it up and get back to the basics of what I'm trying to do.
The multi wood pen I done a recently is going to a friend of mine. I wanted one for display though and had more blanks I had left over from gluing up all those strips of wood. These blanks look nice, but are a challenge to turn. I was careful about gluing them, but with the grain running all directions, it's almost like turning burl. No matter what angle of attack you use with your sharpest gouge, there is tear out if you are not careful and all the luck is there, and the stars align perfectly, and all that jazz.  
This was the second pen I tried turning today. The first one literally blew apart on the lathe. This one, although you can't tell it by the picture, is a reject as well. I kept having to sand the front end of the pen more and more as pieces kept blowing off. This wound up making the front end just short enough that I had a hard time judging how far to press the advance mechanism in. As my recent luck would have it, I ended up pressing it just a tad too far. With the pen retracted all the way, you can hold the pen perfectly vertical and write with it. The end of the ink cartridge is right there at the tip. I refuse to put something like this in my display. Those of you who know me know that I don't allow things to leave my shop in other's hands if it isn't right.
Don't worry. Pens like this one, that are usable but not right; they don't go in the trash. They go in my truck for me to use myself. I said I wouldn't allow things like this leave in other people's hands. I didn't say I wouldn't use it.
Anyway, I decided to just back up and turn a basic pen instead of trying anything fancy or different. Of course, since doing all the different styles I have now done, I don't do just simple, one wood species pens, unless it has some awesome grain. So I looked through my blanks and picked two woods that I have had good luck with in the past, walnut and maple. I did not try anything crazy here. I simply sliced the walnut down the length at an angle and glued a strip of maple in.
It isn't much, but just to do something without problems, like I've had lately, felt good.
That went well, but then I was thinking of what I wanted to do next. I decided that, while I thinking about it, to mount up between centers a piece of scrap wood and do some practice exercises. Sometimes I think it's good just to practice techniques. Even if you know how to do something, practice will either keep you good, or help you improve it in some way.
Next, I liked the way that last pen had turned out, so I wanted to do something else. I thought about more crazy stuff, but settled on doing something similar to the last pen. Just keep it simple. Sometimes simple seems more elegant than the craziest of designs.
This blank is walnut and box elder. Since the box elder is bent pretty good while being pressed between the two pieces of walnut, I thought it would be a good idea to leave this blank overnight. It may self destruct on it's own if I unclamp it too soon.
This is a piece of pipe a good friend gave me a while back to try turning. It looks like PVC, but has a more rubbery feel to it. I think it will make a neat pen if I can turn it without any issues.  
I had tried a small piece of it before, unsuccessfully. I thought I'd give it another shot.
Here are the two blanks glued up. I'm leaving them overnight too. The last time I tried turning this, the tube let go in one of the blanks. I always scuff up the tubes before gluing them, but I think the type of material here may have had something to do with it. I'm hoping the extra curing time will help the situation.
So that's two blanks for tomorrow, hopefully. We'll have to wait and see how they turn out.  

Wednesday, June 26, 2013

How NOT To Turn A Bowl

 
In the last entry, I had left the first bowl to ever be pressed in the bowl pressed drying for today. Well I unclamped it today and am glad to report that the press applied plenty enough pressure and I am very happy with it.
So I went to chucking it up on the lathe and went at it. I love turning bowls. You may notice it is a little shorter than what was shown clamped up in the press yesterday. I turned about an inch off the top when I messed up. That's one of the luxuries of turning bowls. If you make too big a mistake, you don't ruin the top part of the bowl. You just wind up with a shorter bowl.
I was happy with the way things were going. With the new bowl thickness calipers, I was able to get a more accurate measurement of the side walls and was much more comfortable about going thinner than I have in the past. Maybe I was a little too comfortable. If you read the title of this entry, you already know that a huge mistake is about to be told.
As I was getting near the bottom, I slipped with the gouge and made a nasty tear out section in the bottom of the bowl. So with some careful measuring, I figure I could go at least another sixteenth to an eighth inch deeper with no problems. I started doing that and quickly realized maybe that a sixteenth of an inch was about a sixteenth of an inch too much.
You see, when I thought back to see where I made the mistake at, I realized something. I did have enough material to go deeper about an inch and a half from the side where I measured at. However, since I, for some odd reason, like to cut a concave profile on the bottom of my bowls so they are sure to sit flat on a table, that meant I had less material than that closer to the center. Apparently, I had less than a sixteenth of an inch.
This is what happens when you turn clean through the bottom of a bowl. This is how NOT to turn a bowl. It doesn't hold things too well with a large hole in the bottom.
 
.
 
I also ran into another problem today. Well actually it is an ongoing problem that I am constantly learning to deal with. My lathe is actually underpowered for turning a bowl this large. It doesn't matter how light I make my passes, the lathe is under a stain turning this kind of mass. I feel there has to be a way around this problem, since there is no way I'll be able to afford a more substantial lathe anytime in the foreseeable future. So I am, as I'm able, working on a few ideas on that front. I am determined to be able to turn bowls.
I changed the grind on my gouge today to a steeper angle. That seemed to help a tiny bit, but I also plan on trying a ring, or hook cutter, sometimes in the future.
I'm also playing with speed on my lathe. It turned smoother at high speeds, but also seems to bog down easier. So I'm thinking of turning slower until the final passes to clean up rough areas.
I'm also thinking of ways to take some of the work load off of the lathe. If I remove the middle of the rings I glue up for blanks, that would eliminate the need for the lathe to have to turn that much weight in the beginning while I'm roughing everything out. This still would not help me if I'm turning a bowl from a fallen tree though. So that one is still a concept in the works.
I've done some research. The best answer would be to get a larger lathe with more horsepower that can handle that kind of mass. The thing is, when I look at the prices of such lathes, all I can think of is the fact that my kids need something called food more than I need a bigger lathe. So I don't see that happening.
So where does all this lead? Well, in the past, I've built my own tools when I couldn't afford large enough to do what I needed to do. It'll take some time. I've been looking for parts. The largest obstacle will be finding a large enough motor. I do see sometime in the future though that I want to build a heavier duty lathe than my wallet would ever allow me to purchase from a name brand supplier.
One day.  

Tuesday, June 25, 2013

Solving Some Problems

I've had a few "everything goes wrong" days. I guess everyone has had one of these at some time or another. I'm talking about days where everything you try and do only ends in failure or frustration. Well, when I have days like that, it always seems to end up being several days like that. So, Sunday, I took a much needed day off.
Now, with saying that, I have to explain what I mean by a "day off" for me. I have a lot of days I don't do much of anything. It's because there are day my health doesn't allow me to do much. When I take a "day off", I mean I took a day that I was actually in good enough shape to do something, and decided to do it away from the shop or home.
Anyway, with the explanation given, I took a day off and went fishing with one of my sons. We had a great time, and caught a good mess of bream. There is nothing in this world like having a fish dinner you caught yourself.
 
So anyway, I wanted to tell you all about that. Sometimes we all need a break. With that break, I cleared my mind. Then when I got back into the shop, I decided to turn a bowl. That's something I hadn't done in a little while. Well while gluing up the material for the bowl, one of the pieces slipped while fumbling with the clamps, and it was more out of balance than I cared to fight with on the lathe. It looked like my bad luck was still with me.
So today I went into the shop with a mission to fix a couple of problems I've had in the past.
The first problem I had was gluing up materials for bowls. I have been fighting with many clamps in the past. Somewhere on YouTube, while watching a bowl turning video, I seen a brilliantly designed bowl press. I wanted to make one. I couldn't see in that video many specifics on building it, but it wasn't complicated. I took some measurements and went at it.
The hardest thing to figure out was how to take this large clamp I had and remove just the part I needed to use in the press. About the time I was debating on how to do this, my teenage son, James, came towards the back of the shop and said he wished he could help me today. Well, I told him, you came just in time. So I clamped this huge clamp up in the vice, got a hack saw, and showed him what I needed. James is a determined lad. It took him about an hour, but he removed the screw and threaded insert part of the clamp I needed and we were in business.
As I said earlier, it isn't a complicated design. I left plenty of room for gluing up bowls as deep as I would ever have a desire to do. If I'm doing a shallow bowl, just add spacer scrap material between the screw device and the top clamping plate, and clamp it all down. The advantage to this is going to be, with a center point of pressure, there is much less chance of material moving around like it does when I'm trying to wrestle with eight or ten clamps at once. Also, doing it this way is going to be much easier on my back.
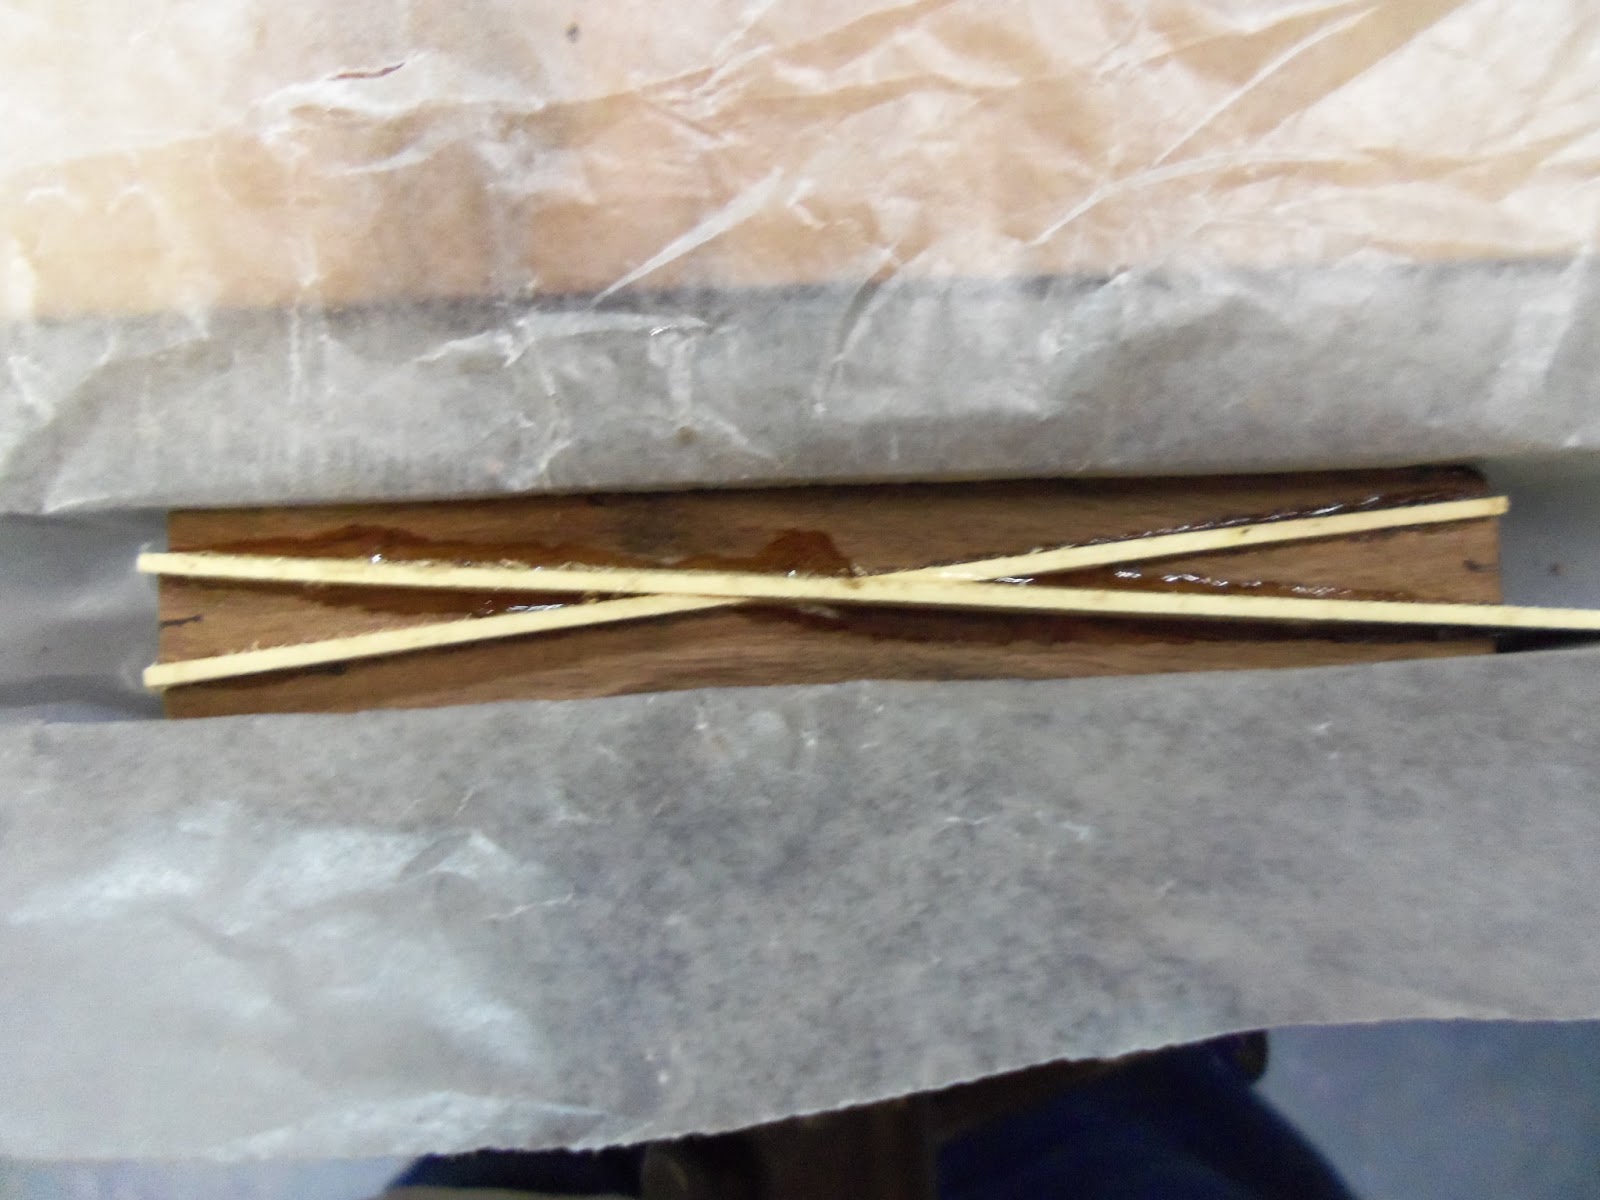
Here, I have the first bowl clamped up in the press. There's a couple of things I'd like to note here.
You may notice the wax paper under the bowl. This is so that any glue that squeezes out goes on the wax paper instead of gluing the bowl to the press. Wax paper is cheap and even when the glue does make it sort of stick to something, it peels right off.
The other thing I wanted to tell you is that after snapping this photo, I noticed some cracking starting on my main support for the screw assembly. I quickly unscrewed it, used some three inch screws going through some pecan wood into the cypress I had made the main support out of, and reinforced that area. It was my first time using it, so some modifications at this point I guess could be expected. Other than that though, it seems to be doing great.
Here is a better view of the material clamped in the press. I seen another advantage to the press when I was snapping this photo. In the past, I've had a time trying to keep the mess of the glue squeeze out from these bowl blank glue ups contained. With this press, it all will run down on the wax paper, which simply gets thrown in the garbage when done.
While my mind was on turning bowls, I thought of another little thing I've been meaning to work on for a while now.
I have several different styles of calipers, but none to accurately measure the thickness of the walls of bowls when turning them. I've been measuring them using the guess method. If you don't know what that is, it means you press the sides between two fingers and guess at the thickness. If any of you have ever turned many bowls using the guess method, then you probably also already know how easy it is to guess your way right through the side or bottom of a bowl.
Some time ago, Steve Goode, over at Scrollsaw Workshop, posted some patterns for some calipers that would be perfect for bowls. I had saved them to my computer, but had just not taken the time to make them. Today, since I was tackling problems, seemed like a good day to get it done.
 These will be much more accurate than guessing. I made them out of quarter inch plywood. It would have been better to rivet them together, but I had them all cut before I realized I was out of rivets that long. So I opted for some screws and lock nuts instead of making a special trip to town.
.
If any of you do any scroll work, don't hesitate to go over to Steve Goode's site I linked to above. It is a great site for scrollers. I have gotten a lot of great patterns and good advice from his site.


Good To Be Back

I typed the following post up several days ago. There has been some kind of technical issue with the blog provider though that has prevented me from posting.
 
.

Well I’m back, and boy does it feel good to have something to actually show. It isn’t much, but today was the most I’ve done in the shop in weeks. This post is actually more than just today’s work. I’ve fiddled around a little here and there the last few weeks, just not enough for a post. So here goes.
 
Here is, or was, my pen display stand. It was simply a dressed up piece of sapelle with some proper sized holes drilled into it that the pens were inserted in. This held them upright so they could be seen. It seemed like a good idea at the time. I was showing them to a friend one day though and noticed something horrifying. The finish on the metal end that sticks in the wood was messed up on some of the pens. From what I can figure, it was just the sharp edges of the holes wearing on them as the pens were removed and replaced numerous times when people take them out to look at. So I had to come up with something better.
I was pondering this things for days when one day I seen one of my sons drawing. He is the artist one of the bunch and has this fancy pencil set he got for his last birthday. Anyway, looking at the way the pencils were neatly arranged in their case gave me an idea.
I took strips of sycamore and routed a groove in them with a three quarter inch router bull nose bit, and cut these strips into short sections. Then I glued those sections to three pieces of plywood and built a sapelle frame around it all to make a display so the pens could lay neatly in it all, much like the arrangement in my son’s art set.
I made the second and third rows a little higher than the ones in front of them so it rose upwards as it goes back. This, in my opinion, just presented the pens better to someone standing in front of the display looking at all of them.

Sometime last week, my brother gave me a long section of corian counter top material. I really didn’t need a counter top, but I thought it would look nice at the front of my shop where I keep my coffee pot. At least it would look better than the old beat up table that had been there. Also, I immediately seen this material and wondered if I could turn a pen with it. So one of my older sons helped me install the counter top, and I was able to cut off some of it to save for pens.
 
Next, I got a request from a friend for another pen just like the multiwood pens I made a while back. Well I set out to make that, only to realize I was out of a couple of the material types to make another one just like it. Actually, I wasn’t completely out, just low enough that I couldn’t cut it up to make it exactly the same. One of the wood species I only had one small strip of. So I set my mind to work trying to figure out how to make a pen using the same material, make it interesting, and very different.
I started gluing the seven types of material together. Then I cut it, flipped one side, and glued it back together. After that dried, I cut it again, flipped one side, and glued again. After multiple days of allowing glue to dry, cutting, flipping, and gluing again, I came up with something interesting.
All I can say about this is, it is interesting.
I will have to wait until I can contact my friend to see if this fits the bill on what he wanted. If not, I’ll have to go back to the drawing board.

So, remember the corian pen?
 Well, since my brother gave me that material, I gave him that first pen. That meant I had to make another one. I had learned a couple of things about turning corian on the other one.
For one thing, I learned that a scraper cuts it better than a gouge. Just hold the edge at a downward angle and it cuts the corian rather than scrape, and leaves a much smoother finish than actual cutting tools.
Next thing I learned was that you need to wear snug fitting safety glasses, not just a face shield, when working with corian. This stuff floats around in the air more than wood and is hell to get out of your eyes.
And finally,
I learned to keep my shop brush nearby. This stuff sticks to everything like it’s magnetized to it. A brush is required to get it off. You can swipe away at it and it’ll get airborne and stick right back to whatever it was on to start with.
It is fun to work with though.
So I turned another one to replace the one I gave my brother.
And I made a fat one without the center ring.
Next I turned a one piece purple heart pen. At least this was bought from my hardwood supplier as purple heart. I realized today though that I have three different pieces of purple heart that look nothing alike. I’m not sure if this means they are not all purple heart or if they are just from different trees and therefore look different. Either way, they look pretty, so it’s alright.
I was looking through my blanks for something else, and came across this interesting looking piece of bocote, and wanted to turn it.
Since I was on a roll, and while looking through those blanks, I ran across this forgotten piece of spalted something. I call it spalted something because all I know about it is that is has a beautiful spalted pattern on it. I have no idea what kind of wood it is though. This came off a larger piece of wood that has this for sapwood, and heart wood that looks like mahogany. I have yet to find anyone who can definitely identify it with certainty. So I’m calling it mystery wood. This piece I’m calling a spalted something pen.
Just before Father’s Day, I talked to my buddy Dave about a marking knife. He refused payment, and brought me two of them that he forged himself. I made handles for them out of sapelle.
.
Well that’s all for now. I was down, but not out. During the time I was down and not able to do much, I was steadily plotting and planning, and gluing up in the case of one of the pens, for my return. Some of you who know me know that even when I’m down, my mind is still working on that next project. It keeps me going. Now I just hope I can stay in the shop for a while without any more down time. Too much down time depresses me. I’d rather be making something besides just plans.