If you seen the pump and elevator column I've spent the last couple of days making, then I'm sure you already know that we now need a base to start building this thing upon. So that's what I decided to start on today.
I spent quite a bit of time debating this morning on what wood to use. I definitely did not want to use plywood for the sides. I took into consideration weight and strength. Whatever I chose though also had to be something I had in sizes that were wide and long enough to work. I finally decided to stick with my old standby, cottonwood.
Cottonwood is strong, yet light. The only problem I have is, if I looked at the nicest pieces, they are kind of plain, and I wanted to use something with some character.

So I got into my "ugly stack". Let me explain. I separate my cottonwood as I come to it. In one stack is perfect material for large work such as cabinetry. These are straight grain, plain looking, pretty wood. If I'm working on something smaller though that I want character in, I have an ugly stack. This is a stack I've made with pieces that have crooked grain, burl material, off color strips glued in, and other deficiencies that make them unsuitable for larger work. For small work though, these ugly pieces, in my opinion, provide the most interesting looks to them.
A good example is the board in this photo, in front; the one I chose for the front of the base. It has burl type material in it. It is situated on the board so that it would look terrible on something larger, but I think it'll look very nice for the front of the base once it's finished.
The next problem I had came when I looked at the plans for the base. The plans call for rabbet joints with splines that will later help hold the plates inside of it. This would work just fine, but I just simply do not like rabbeted joints. In my opinion they are as ugly as butt joints and I use something else when I can get away with it.

So I figured it was time to pull out the Stumpy Nubs Box Joint Machine again.
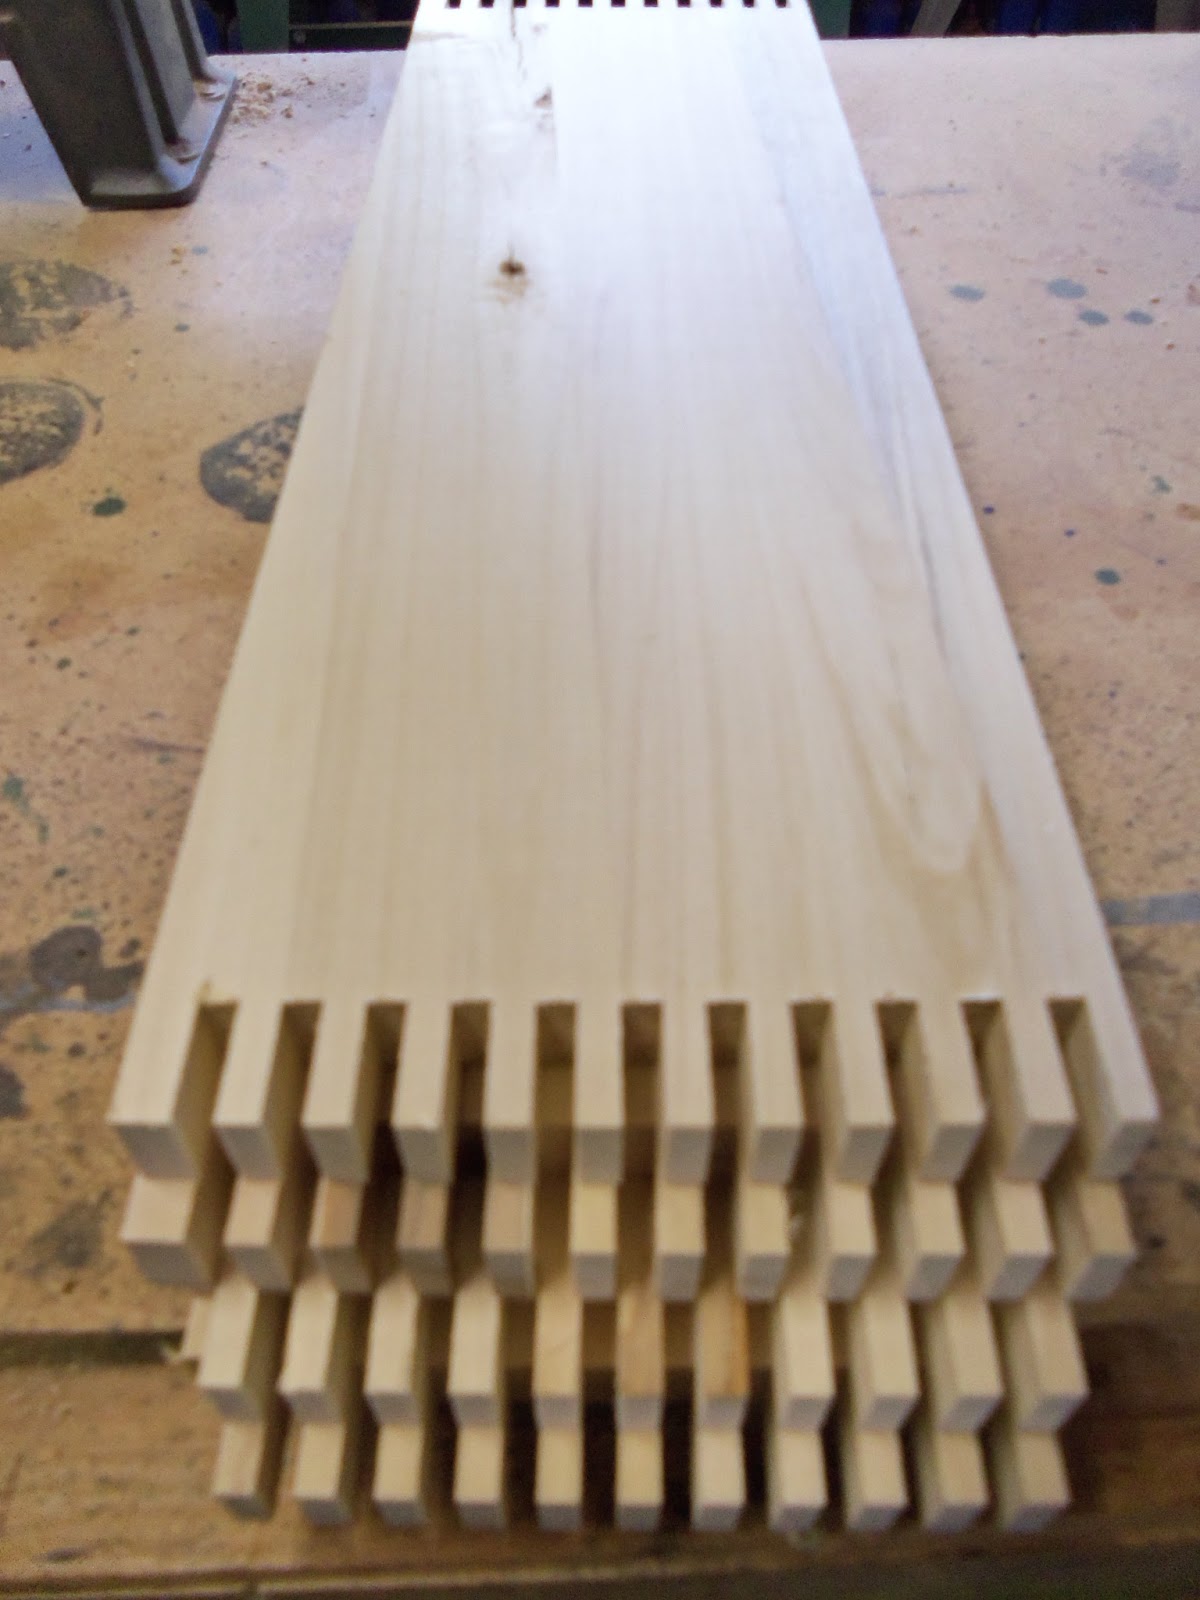
I love this machine. I makes some beautiful, strong, and accurate joints.

Then, just put some glue in between the fingers, clamp all corners tight, double check just to be sure, and you've got an easy to square box.
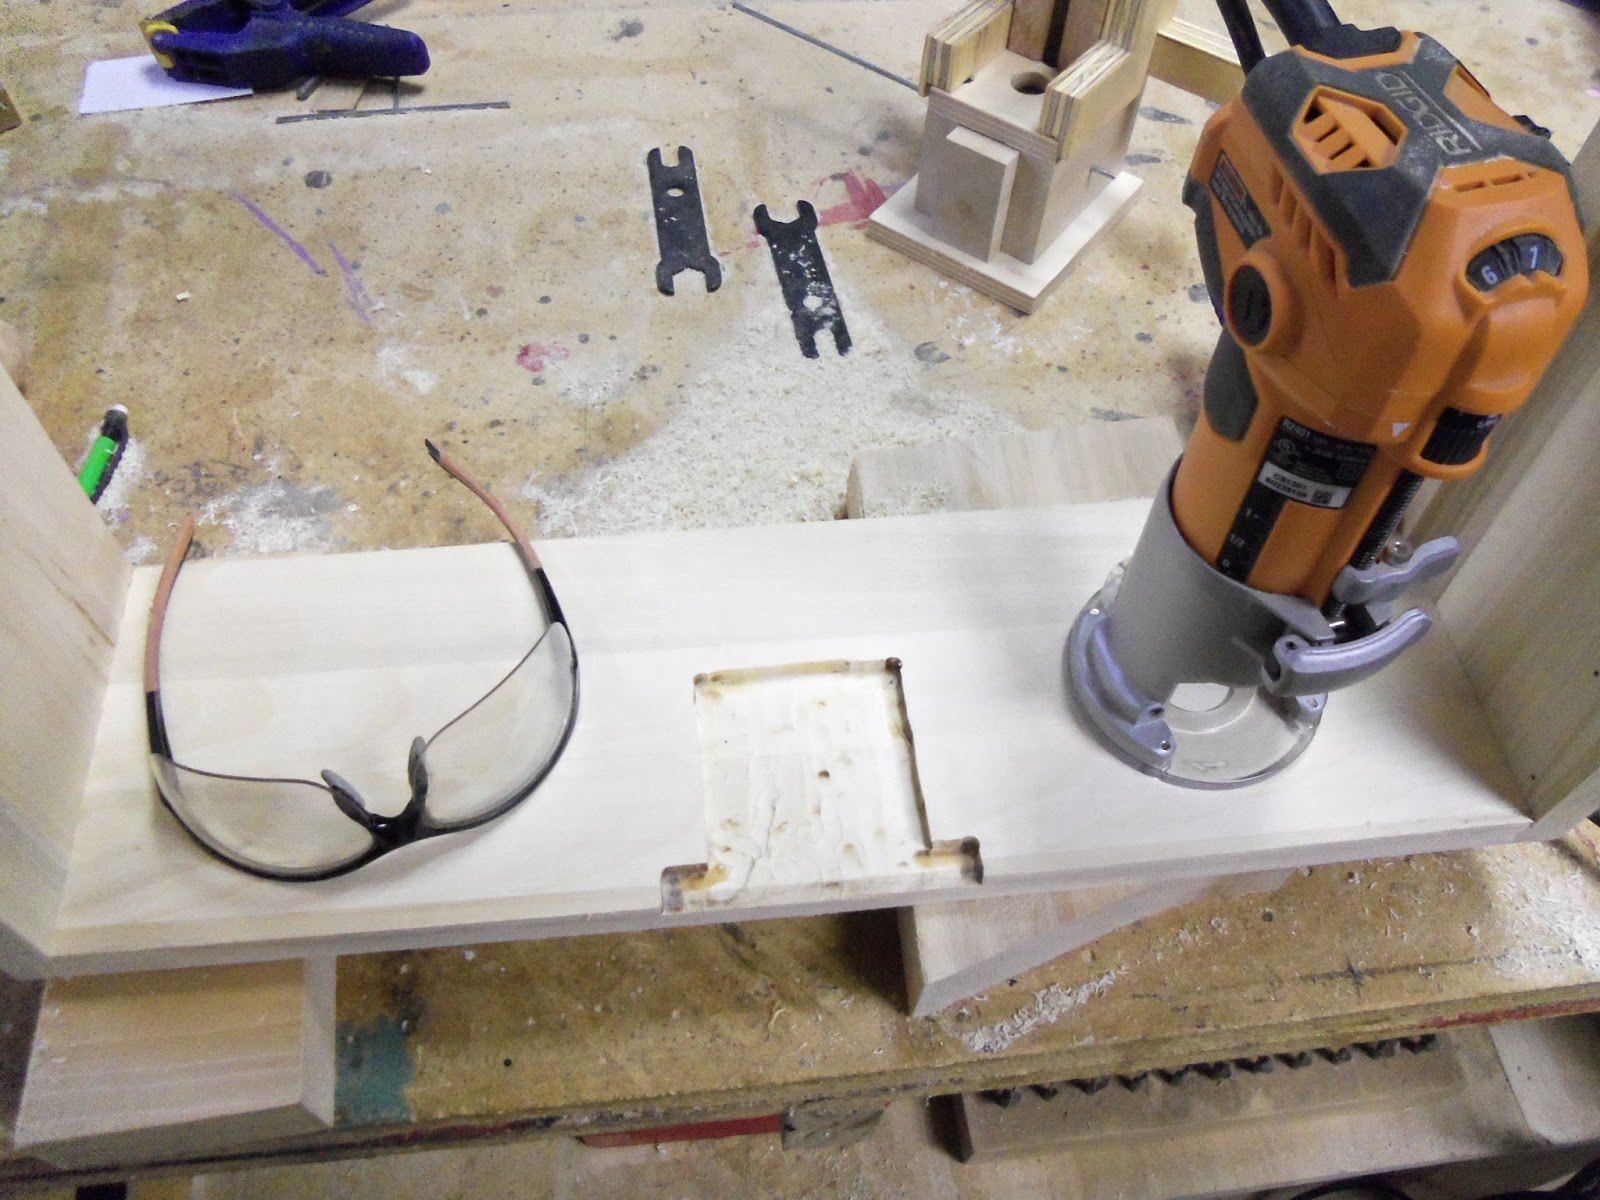
In order to allow the elevator column to sit flush with the back of the base, you have to inset the pump assembly into the back of the base. The easiest way to do this in my opinion is a spiral bit in a palm router.

Then the center of that inset has to be removed to allow the slider in the pump assembly room to move in and out. It extends out almost flush with the outside of the back of the box. You could drill some holes and use a chisel to remove this material. To me though, it's easier just to put it on the scroll saw and remove it.
If you look closely you may notice I have removed more material than necessary. It will not harm the function of the machine, and it is on the back, so I'm leaving it. However, I thought I'd tell you the reason there is more removed than I originally intended. This was one of those cases where I should have marked my work before starting. I thought I'd eyeball it. This turned out not to be such a good idea. I cut right past where I needed to over to the far side of the recess area. I was almost completely done cutting when I realized what I'd done.

The recess allows the elevator column to be properly positioned against the back while still having room for a functioning pump.

The cutout allows the slider to come out far enough from the pump to be functional.

The bottom of the base is made of plywood. This allows me to use a solid piece for the bottom. I don't have anything in solid wood large enough for that. For stability I did not want to use glued up material for the bottom.
The bottom is attached with glue and eighteen gauge brad nails.

The pump assembly is screwed to the bottom of the base. If you remember, the elevator column is lined up with pins on top of the pump. Between the pins, the back, and the supports we will later put under the bottom of it, the elevator is assured to be in the proper orientation when the machine is in use.
No comments:
Post a Comment