Find Select Projects Easier

If you're looking for a specific project that I've done, please click here for a categorized list page.

Don't Forget To Leave A Comment

If an article interests you, please click below it where it tells the number of comments and leave one. I appreciate all input.

Get My Blog In Your Email

Enter your email address:

Delivered by FeedBurner

Monday, June 6, 2011

Jewelry Cabinet by Willy B.


This is a project Willy B. built from plans in an old Woodsmith magazine that he made some modifications to in order to make it to his liking. It stands five feet tall with a top section that he designed himself. It is made out of red oak with legs that he also designed and built himself. It is twenty one inches wide and fifteen inches deep.


The top section he designed to hold pieces that are worn often. Each drawer he made separations in and lined with red felt. The first drawer holds rings, the second has twelve small compartments for small items. The separations get larger as you go down until the last couple are full drawers. When you open the L-shaped sides it reveals hooks on each side to hang necklaces on.


Willy, this is another fine project. You can really see the dedication to quality in each of your pieces of work.


Sunday, June 5, 2011

Willy B. Does It His Way

I talk to a lot of different wood workers, both professional and hobbyists like myself. There is a huge difference in how some view the use of patterns. I, myself, use patterns for just about everything I build these days. I find that it allows me to simply enjoy the wood working that I love so much without having to stop and worry so much about designing, for example, that I don't enjoy so much. I find a design I like in a pattern most times, and work from there. I usually build a project the first time pretty close to the pattern. After, that, the gloves are off. I may take that design in any number of directions.
The one argument I hear the most against patterns is that people like making their projects original. For those that enjoy designing, I think that's great. Some of us don't like designing though. So for that originality argument, I have two key point that I usually point out.
The first is that it is very, very rare for anyone to think up anything that is truly original. It may be a new take on something, but we all naturally draw ideas from what we have seen. I can take aspects of a Chippendale design and a Maloof design and combine them to come up with something that may never have been seen before. In the end though, how original is the combination of two well known designs? That isn't to put down people who design their own projects. It's to point out that even pattern users can still come up with something new using tried and true designs, but with plans.
That brings me to my second point. Just because you use a pattern doesn't mean you are limited to building a project strictly by that pattern. I compare patterns to a road map. Regular readers have read this before, but I think it is a good point to repeat again. If you are trying to get to a destination on a road map, there are usually multiple ways to get there. You can take any of those multiple ways and still arrive where you desire. The same can be said about patterns. You can take many roads with a pattern, and still arrive where you wish with a project. The use of a design on a patter is limited only by your own imagination.
That brings us to Willy B.'s Buffet Cabinet.


The plans for this cabinet can be found here at Wildwood Designs. Some may recognize it as the same cabinet I built a while back. Willy took the design and really made it his own though. That is the inspiration for my rambling before the photos on making a pattern your own way. There are no rules about sticking with a pattern. I really like the way Willy done this one. The changes he made really stand out as inspirational to me, since I have built this project myself.

For starters, Willy's cabinet is six inches deeper than the plans call for. That doesn't sound like much, just extend the depth measurement, right? Well, there is a bit more to that on this project. To extend the depth six more inches means that Willy also redesigned all the side facing scroll work and the scroll design that supports the side shelves. That in itself makes it quite an undertaking.

Willy made his own legs for this project from oak four by fours. If you ever want to build this, the price for the recommended legs can add up quickly. The one's I wanted to use for mine cost over forty bucks a piece, and you need six of them. It's not hard to make these legs. It only takes time and patience. I highly recommend anyone building this project to give it a go before spending that kind of money on legs. It's fun, and you get the satisfaction of knowing you built them instead of sticking something bought on it. The added advantage is that by building them, you can color match the cabinet they are going on easier than if you bought them.

Willy's cabinet is made out of half inch oak plywood. Another interesting change he made was too the shelves in the middle cabinet section. Instead of wood, he put in glass shelves. I am going to have to consider that option next time I build one of these. When I read that he used glass, I had one of those "why didn't I think of that" moments.

Willy, this is truly amazing work. Thank you for sharing it with us. I do hope you have plans to send me more project photos to share.


Friday, June 3, 2011

Chess Set by Willy B.


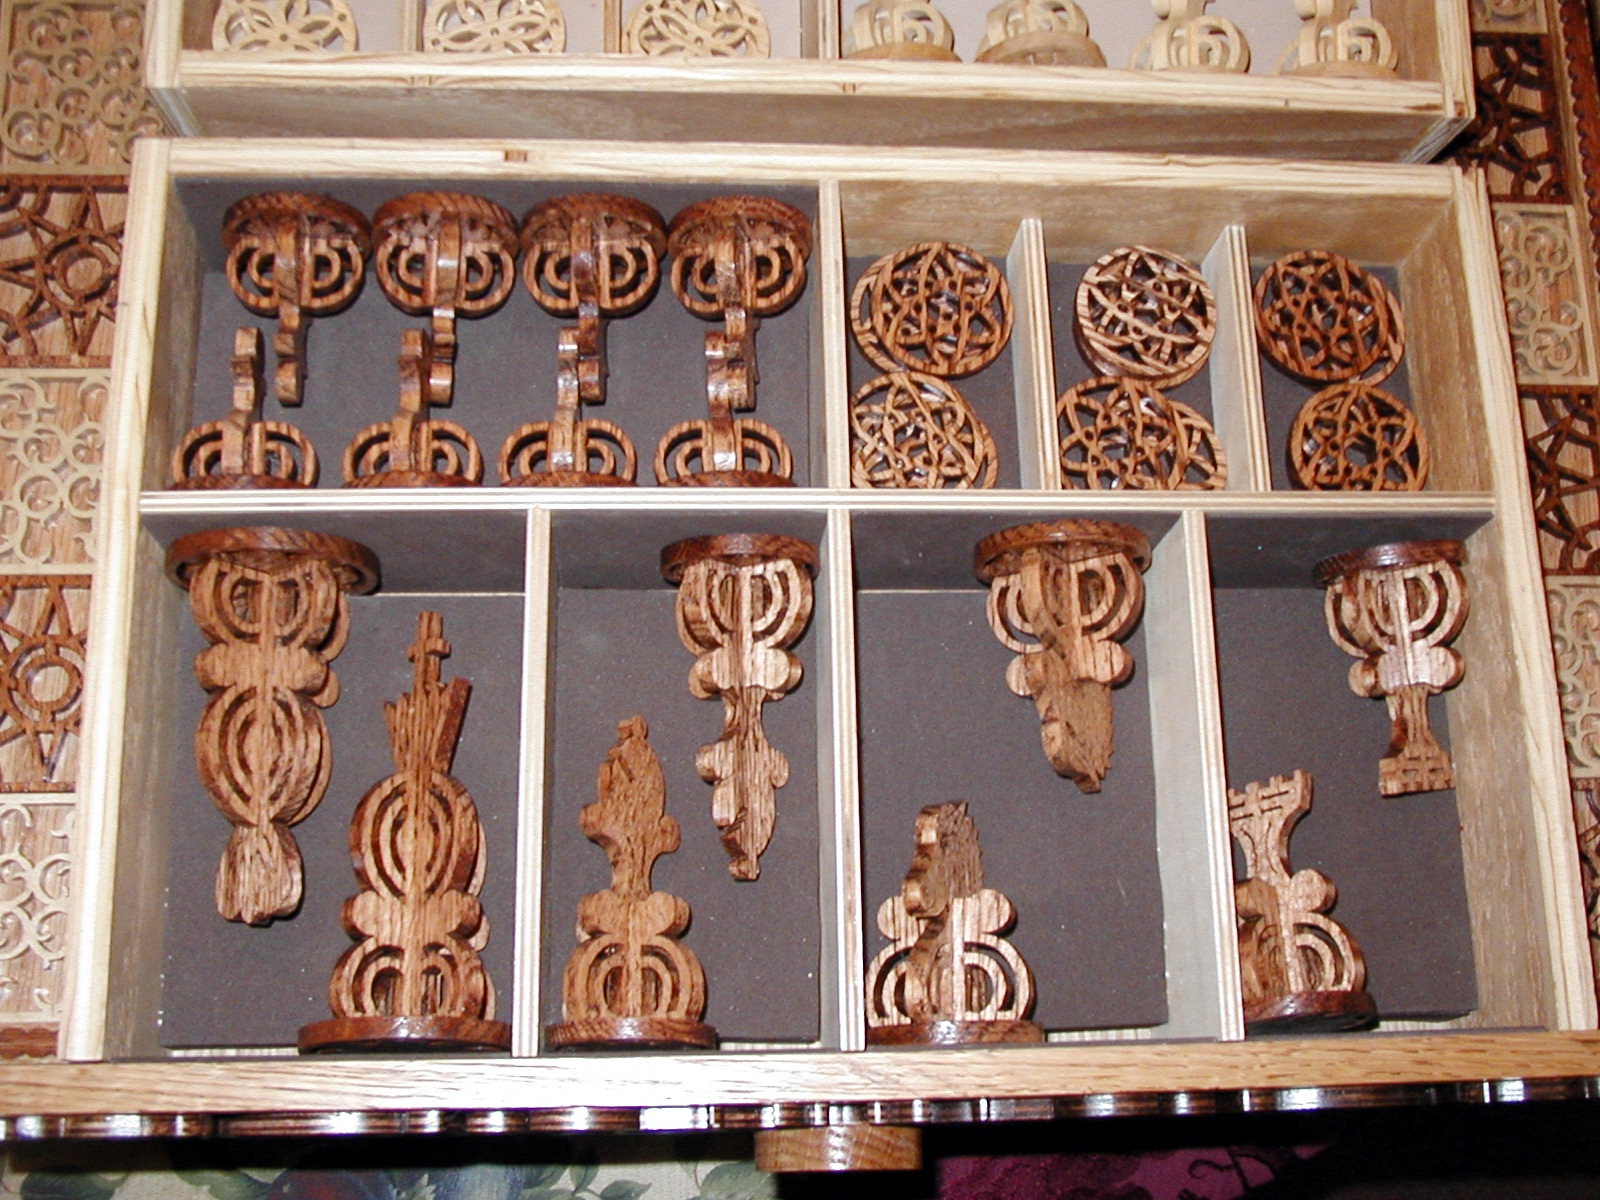
This is a chess set that Willy B. made for his son. Each square is about three inches to give you an idea of the size of this work of art. The dark squares and pieces are red oak. The light squares and pieces are maple. Willy says he can't remember where he got the plans from. If anyone is interested in building one like it, let me know, and I'll do my best to find the plans for it. It functional for a chess fan as well as a beautiful work of art.

At first glance of these photos, I thought it was a beautiful piece, with the squares being solid squares, glued up like a cutting board. Then I started looking closer. Each square also has detailed fret work in it. That just added a whole new element to an already astounding piece of work.

This is great Willy. I'll bet anyone your son may play chess with loses to him because they are too busy wishing they had this chess set for themselves.

Thank you again for sharing your work with us.


Mike T. Has Some Good Advice

One day, a friend of Mike T. came into his garage and asked Mike to make something for him from a poster he had rolled up in his hands. Being a busy man, Mike told him to set the poster down and he would get to it later. This is where Mike's advice comes in. He says to always be sure what you are supposed to be doing before you say you will do it.
That's very good advice Mike, because I would have been tempted to back out of this one. I understand though. Some of us are still around who are men of our word. I think you may be one of those men, because you not only done it, you did a fantastic job of it too.
This is called "Our Lady Of Guadalupe". It is a beautiful piece of art. Mike did say he got another friend to paint the faces. He says he does know his limitations. It is a segmented project that is made out of three quarter inch thick clear white pine.
Mike also told that he is a proud member of the Inland Empire Scroll Saw Association of So. Ca. Any fellow scrollers in that area may want to check them out.
Mike, this is some impressive work. I hope you send me more photos of your projects so we all can enjoy them. Thank you very much for sharing this with us.

Thursday, June 2, 2011

Meet Mr. Willy B., A Scroll Saw Master


I'd like to introduce you all to Willy B. Willy has been emailing me some beautiful photos of some of the work he has done. I will be featuring his work over the next few days. I always welcome readers to send me photos of their work for me to feature here. My projects often take me so long that I go so far between posts that people start emailing me wanting to know that I'm alright and working on something new. If you readers would send me photos and general descriptions of your projects, I could make more regular posts so that everyone will know I'm still alive. Besides, I think we all enjoy seeing beautiful work anyway, don't we?

Willy B built this Chimes of Normandy clock and stand out of plywood for his son. He also added fifteen white Christmas lights to it to light it up. The clock design came from Wildwood Designs and you can click on the highlighted words to go straight to their site to order the plans for yourself if you like. I warn you though. I've done a few of these large clocks. They aren't for the impatient.

I am pretty sure the table the clock is sitting on is from Wildwood Design as well. I'll have to make a point of asking Willy for more details on that in the future.

Mr. Willy, I do so very much appreciate you sending me all the photos. I hope you send me more in the future. I won't post them all at once though. We don't want to overwhelm folks with all your magnificent work. Everything you have sent me has been so beautiful.


Monday, May 30, 2011

Carousel Horse Display


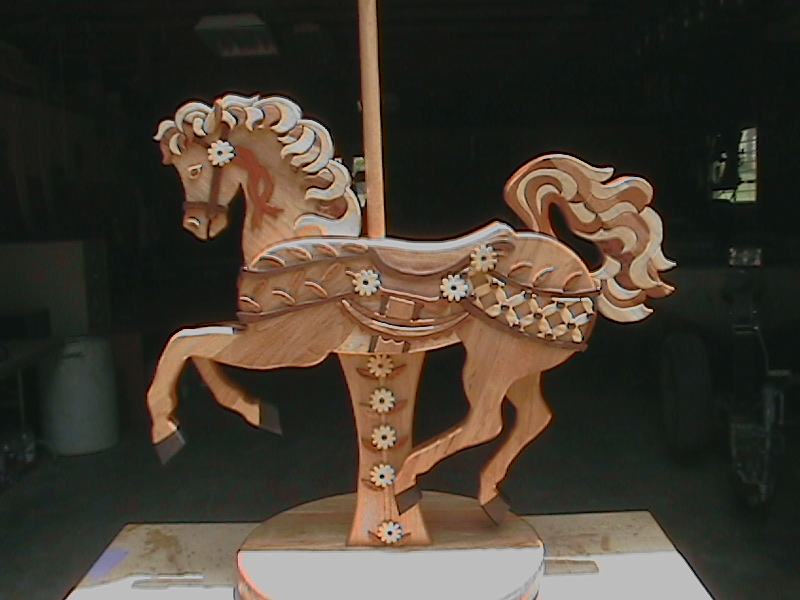
Since I ordered the plans for this project from WoodcraftPlans.com, I have wound up building it in a variety of different versions. However, my original plan was to build it like you see in the photos above, with wood grain colors instead of paint. To give you an idea of the size of it, the pole is four foot tall.

It is finished with Zinsser clear slellac. Under that, it has a variety of woods including cottonwood, oak, pecan, mahogany, cedar, and walnut.


Sunday, April 24, 2011

Rocking Iron Horse


I have built several of these in the past. If built according to the plans though, there are wood slats for the sides of the boiler, with space in between them. I've been saying for some time now that I thought it would look better with a solid built boiler. I finally decided the only way to find that out though was going to be to actually build it. So I did.


Friday, April 15, 2011

Scrollwork Desk Cabinet

This is what has been keeping me occupied lately. This is a scroll work desk cabinet. The plans to build this can be purchased here. It is made of cottonwood with mahogany accents. It is forty six inches wide and seven feet tall.
The upper section has ten doors, four small ones on each side that and the two large double doors. Above that, on top of the crowned topper, there is additional storage space inside the fenced area.
On each side of the ten door panel are shelves for even more storage.
Below that is a decorative area that lets down for a writing table.
Then four drawers below that for even more storage. If that isn't enough storage, you'll notice also more shelves beside the writing table, the drawers, and on the base on each side of the scrolled arch piece.
Here is the storage space behind the large double doors on the upper level.
All of the small doors on each side of the large double doors open for small areas of additional storage.
Here's the writing table opened to reveal the storage behind it.
On each side of the four drawers is a compartment that is sort of hidden in plain site. The double doors on each side open to reveal yet more storage area. Most people never notice these. They are right around the corner from false door panels on the front. Unless you pull the knobs to open these doors, most assume they are false panels as well.
And the four drawers open.

This has been a very exciting project for me. It is by far the largest I have ever tackled. I wanted a challenge and this did provide it. If anyone wants to build this, the plans are well worth the cost. It will take patience though. If you plan on building this as a weekend project, plan on a lot of weekends.

I hope this project was worth the wait for you all to see. Now my problem is figuring out what to build next.

Monday, March 28, 2011

MIA

MIA stands for missing in action. Maybe my present situation would be more of a case of missing WHILE in action. OK! Bad joke. There have been many times in the past that I didn't post for a while that I started getting emails from people concerned about me. I wanted to let everyone know before that happened this time that I am doing fairy well lately. I am just in the middle of a very large project. I also couldn't help but post my current progress. What you see in the photo is just the first two levels of a desk cabinet I am currently building. At the present point in construction, it stands two foot and seven inches tall. When completed, it will be over six feet in height. The finished piece will have a total of fourteen doors of different sizes, four drawers, and a fold down writing table. I'm not sure how much longer this one is going to take. I will be back with more photos when it's done though.

Friday, March 18, 2011

Chippendale Buffet Cabinet


This is what has been keeping me busy as of late. This is the Chippendale Buffet Cabinet. The plans for this cabinet can be purchased here from Wildwood Designs. It looks quite intimidating to build. It really is not. It does require that you have plenty of patience and time though. The actual cabinet part of it I built in a day. The feet took me another two days to finish. The scroll work took me close to two weeks. Then it has to be finished.
Let's talked about those feet. The cheapest feet I could find that were anything close to what the design calls for were close to twenty dollars plus shipping. I also found some I really liked that were closer to fifty dollars. With those prices, and the fact that this cabinet has six feet, prohibited me from going that route though. So I made my own feet. With a little knowledge and a band saw, they really aren't that difficult. The hardest part about making them was the sanding. I use power sanders for pretty much everything. There was a lot of hand sanding on these though because of the curves that the power sander just could not get into.
As for the wood, I used cottonwood for the feet and the actual cabinet. Then I stained the cottonwood with Minwax Gloss Pecan stain. All of the scroll work was done using half inch cabinet grade plywood. After assembly, everything was then finished with three coats of Minwax semi gloss polyurethane.
I changed quite a few things having to do with the construction from the plans. According to the plans, all the scroll work was supposed to be done with quarter inch material. I done it in half inch. Also, for the thin sections near the top and bottom, you can't see them, but there are hidden cleats that help support everything. I just didn't like the weight that was supposed to be sitting on nothing but scroll work. The other changes were caused by the fact that four main plates I built using three quarter inch cottonwood. The plans call for half inch. The fact that I changed this thickness threw most all of the measurement off on everything else. It wasn't a big deal, but it did make me have to stop and think through everything as I was constructing the various pieces.
I hope you all enjoy seeing something like this. After doing the very large chandelier a while back, I realized that I really enjoy building large pieces that include a lot of scroll work. So, furniture seemed like a natural progression to me. I enjoyed building this so much that my next project is a cabinet that is larger than this one. So, it looks like it may be weeks before my next post too.


Tuesday, March 8, 2011

A Reader's Project

Some time ago I got an email from a guy named Bruce that had seen the motorcycles I have built and posted here on this blog. He wanted to build one. He and I talked back and forth for a few days via email. I offered him whatever advice I could think of on the building of the project. I really didn't know if I was much help or not, but I do try to help fellow wood workers in any way that I can.
So, I got an email from him the other day. He had completed his project. He sent a photo, but to be honest about it, I was so tired that night that I saved the photo without even looking at it. Well, I did look at it tonight and I was simply flabbergasted. In my opinion, this far surpasses anything I could have done. Great job Bruce. So what's your next project?
Any fellow woodworkers out there that read my blog, I would love to make this a regular thing, showcasing other's works as well as my own. Send me an email with photos to greasemonkeyredneck@yahoo.com


Thursday, February 24, 2011

Steepled Church Clock


I know it has been a while since I posted anything new. I apologize. A lot of times during the winter months, my extremely messed up back gives me more fits than normal. This winter has seemed especially harsh on me. This is the first project I have done worth posting since I've been back on my feet.
This clock was built using plans that can be purchased here from Wildwood Designs. I did make a few design changes to my own liking. For example, I made a taller steeple than what is drawn out in the plans. If you wish to build one like it though, you can go by the plans, or if you have questions about what changes I made, contact me, I'm always more than happy to help.
On the clock I built, the base, the pews and pulpit inside of it, and the shell of the church are all built of mahogany. The floor and the center roof trim is made of oak. All the other trim is made of cottonwood. There is a light inside. I used a battery operated fluorescent light I bought at Wal-Mart. The clock insert I purchased from Wildwood Designs. They have a wide variety of styles and sizes to choose from.
The main change I made to the original design was the steeple. I was not happy with the original steeple. To me it doesn't even look like a steeple. It looked to me more like a pyramid that has been airlifted somewhere out of Egypt maybe, and dropped on top of a church. So I made one almost double in height.
The clock has ten dormer type gables, five on each side, all with decorative trim. There is also decorative trim on the front edge of the roof and the two gables on the front of the church. There are pews and a pulpit inside the church.
I hope you enjoy this one. If the good Lord's willing, I pray that I'll be able to do a lot more now that spring time is quickly approaching.


Friday, January 7, 2011

The Italiante


This is the Italiante Chandelier. Anyone interested in building one of these can purchase the plans for it here. If you are used to ordering plans and decide to order these, I would like to warn you that you may be in for a surprise. When you look at these plans, if you do as I did, you will immediately think there is no way you'll ever be able to complete this. The plans offer very little instructions, and what there is of instructions are written in italian. There are no clear photos to help with construction. The only photos are on the plans themselves and are basically photocopies. If you've ever seen a color photo that has been photocopied, then you already know that it does not produce a picture with any kind of detail. If you still want to do this though, contact me and I can offer some advice if I can. Once you get started building, it isn't nearly as hard as it seems if you like giant jigsaw puzzles.
Now, all that being said, I would like to say next that this is, by far, the most challenging project I have ever attempted. This project challenged my skill, my tools, and most of all, my patience. According to what I read, you are supposed to have a minimum of an eighteen inch scroll saw to complete this project. I cut it on my old sixteen inch Delta with Flying Dutchman #3 spiral blades. So it can be done on an old cheap sixteen inch machine. It is not easy though. The largest pieces are eighteen inches wide and close to two feet long and need to be stack cut six high of quarter inch material. So, be ready to go through some blades. After completing this project, I realized I had used up over four dozen blades.
For the one I built, the main assembly is made of luan plywood. I don't necessarily like plywood, as some of you may know. I couldn't find any other source though for thin wood large enough for these pieces. The curves pieces of the domes and right below the domes is made of ten mil birch veneer. Everything else is cut out of cottonwood. I redesigned the candle holders to where I could put flameless candles on top of them. These can be moved by taking off some round bases I have on it so that you can use regular candles of you desired.
Upon completion, the Italiante is four feet tall, thirty six inches wide at it's widest point, and holds twenty four candles.
I'd also like to tell that I bought the plans for this project back during the early summer. I had been saving it for maybe a winter project. I had no other reason for building this besides the fact that I wanted to challenge myself. I built another chandelier sometime last year I think. While it was also a nice piece, it had turned out to be much easier than I had expected. Also some of my other projects had become sort of mundane at times. I had made up my mind that I wanted to do a project that challenged me at the scroll saw. This one did. I enjoyed it enough though that I'm already looking for something even more challenging! Give me some time and we'll see what I can come up with.