Find Select Projects Easier

If you're looking for a specific project that I've done, please click here for a categorized list page.

Don't Forget To Leave A Comment

If an article interests you, please click below it where it tells the number of comments and leave one. I appreciate all input.

Get My Blog In Your Email

Enter your email address:

Delivered by FeedBurner

Thursday, April 11, 2013

Marble Machine Goes Modular - Base Plates

Yesterday I built the base. Inside the base there will be plates with holes in a grid patterns. With this grid of holes on these plates, it will be possible to place marbles in the holes, place pieces with holes in the bottom of them on top of the marbles, locking things together so nothing moves. It is with this type of system upon which everything else will be possible to build.
First thing today I had to place corner pieces and a tab on the inside of the front for the plates to sit on.
Next I built the feed ramp. This is just an angled ramp that feeds into the top of the marble pump. When building different scenarios with the building block like pieces, the end paths will have to always end feed into the marble feed ramp in the center.
Then pieces of plywood are cut to fit on each side of the feed ramp.
I used plywood here for flatness. Anything other than flat here will cause problems later as the pieces are built up in height.
I had to test all the marbles. The marbles are supposed to be five eighths an inch in diameter. However, not all the marbles are the exact correct size. So, to weed out the larger, misshaped, and otherwise unusable marbles, you test them. I drill a five eighths inch hole through a piece of wood. If a marble fits, even snugly like you see in this photo, then it will work in the machine without causing problems.
Here is an example of a marble that is unusable. It is too large to fit through the hole. Therefore, it will be too large for the machine parts and will hang up in places, causing inevitable jams.
With the marbles tested, and the bad ones weeded out, that gave me my first opportunity to truly test the whole feed and pump assembly as a complete unit. So far, everything seems to be working as it should.
Then for those holes I talked about earlier. Using light pencil lines that can be sanded off later, I marked off a grid for the holes. Then I bored them deep enough into the plates that a marble will sit just a hair over halfway down in the hole. The roughly half of the marble that will stick above the plate will interlock with parts that will go on top of this. 

Wednesday, April 10, 2013

Marble Machine Goes Modular - The Base

If you seen the pump and elevator column I've spent the last couple of days making, then I'm sure you already know that we now need a base to start building this thing upon. So that's what I decided to start on today.
I spent quite a bit of time debating this morning on what wood to use. I definitely did not want to use plywood for the sides. I took into consideration weight and strength. Whatever I chose though also had to be something I had in sizes that were wide and long enough to work. I finally decided to stick with my old standby, cottonwood.
Cottonwood is strong, yet light. The only problem I have is, if I looked at the nicest pieces, they are kind of plain, and I wanted to use something with some character.
So I got into my "ugly stack". Let me explain. I separate my cottonwood as I come to it. In one stack is perfect material for large work such as cabinetry. These are straight grain, plain looking, pretty wood. If I'm working on something smaller though that I want character in, I have an ugly stack. This is a stack I've made with pieces that have crooked grain, burl material, off color strips glued in, and other deficiencies that make them unsuitable for larger work. For small work though, these ugly pieces, in my opinion, provide the most interesting looks to them.
A good example is the board in this photo, in front; the one I chose for the front of the base. It has burl type material in it. It is situated on the board so that it would look terrible on something larger, but I think it'll look very nice for the front of the base once it's finished. 
The next problem I had came when I looked at the plans for the base. The plans call for rabbet joints with splines that will later help hold the plates inside of it. This would work just fine, but I just simply do not like rabbeted joints. In my opinion they are as ugly as butt joints and I use something else when I can get away with it.
So I figured it was time to pull out the Stumpy Nubs Box Joint Machine again.
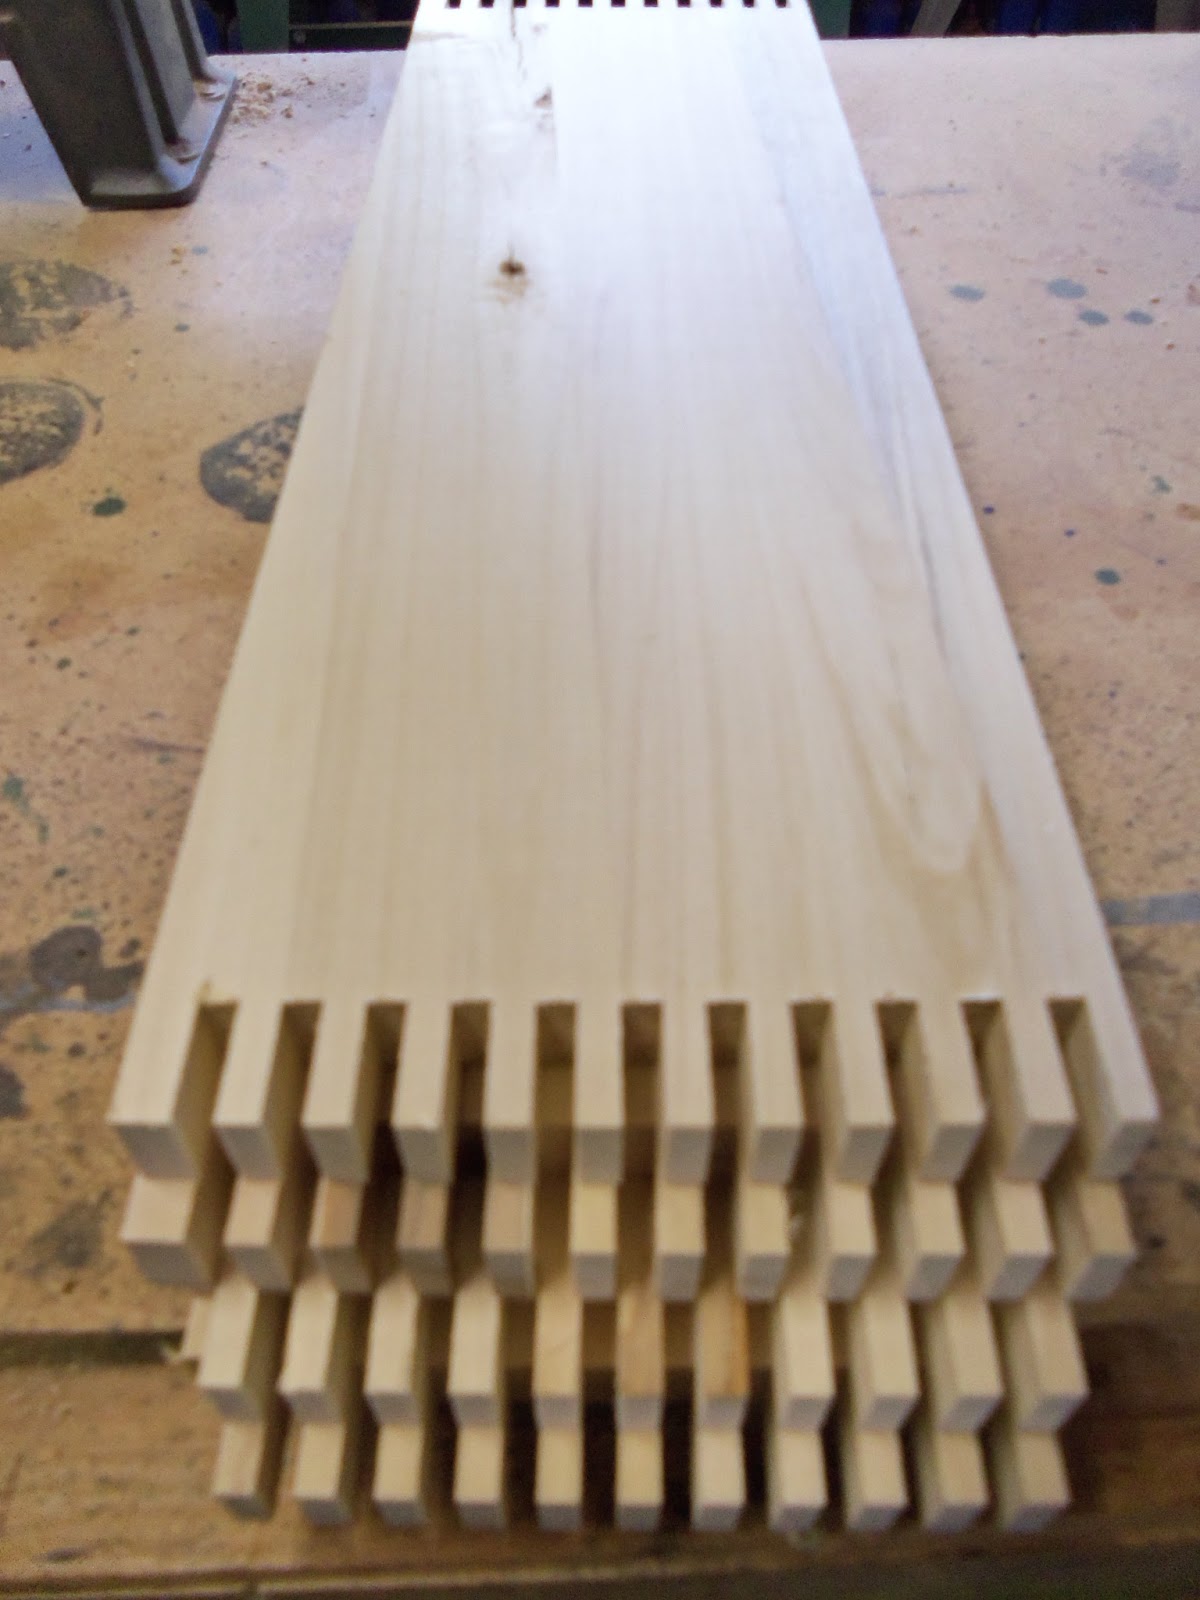
I love this machine. I makes some beautiful, strong, and accurate joints.
Then, just put some glue in between the fingers, clamp all corners tight, double check just to be sure, and you've got an easy to square box.
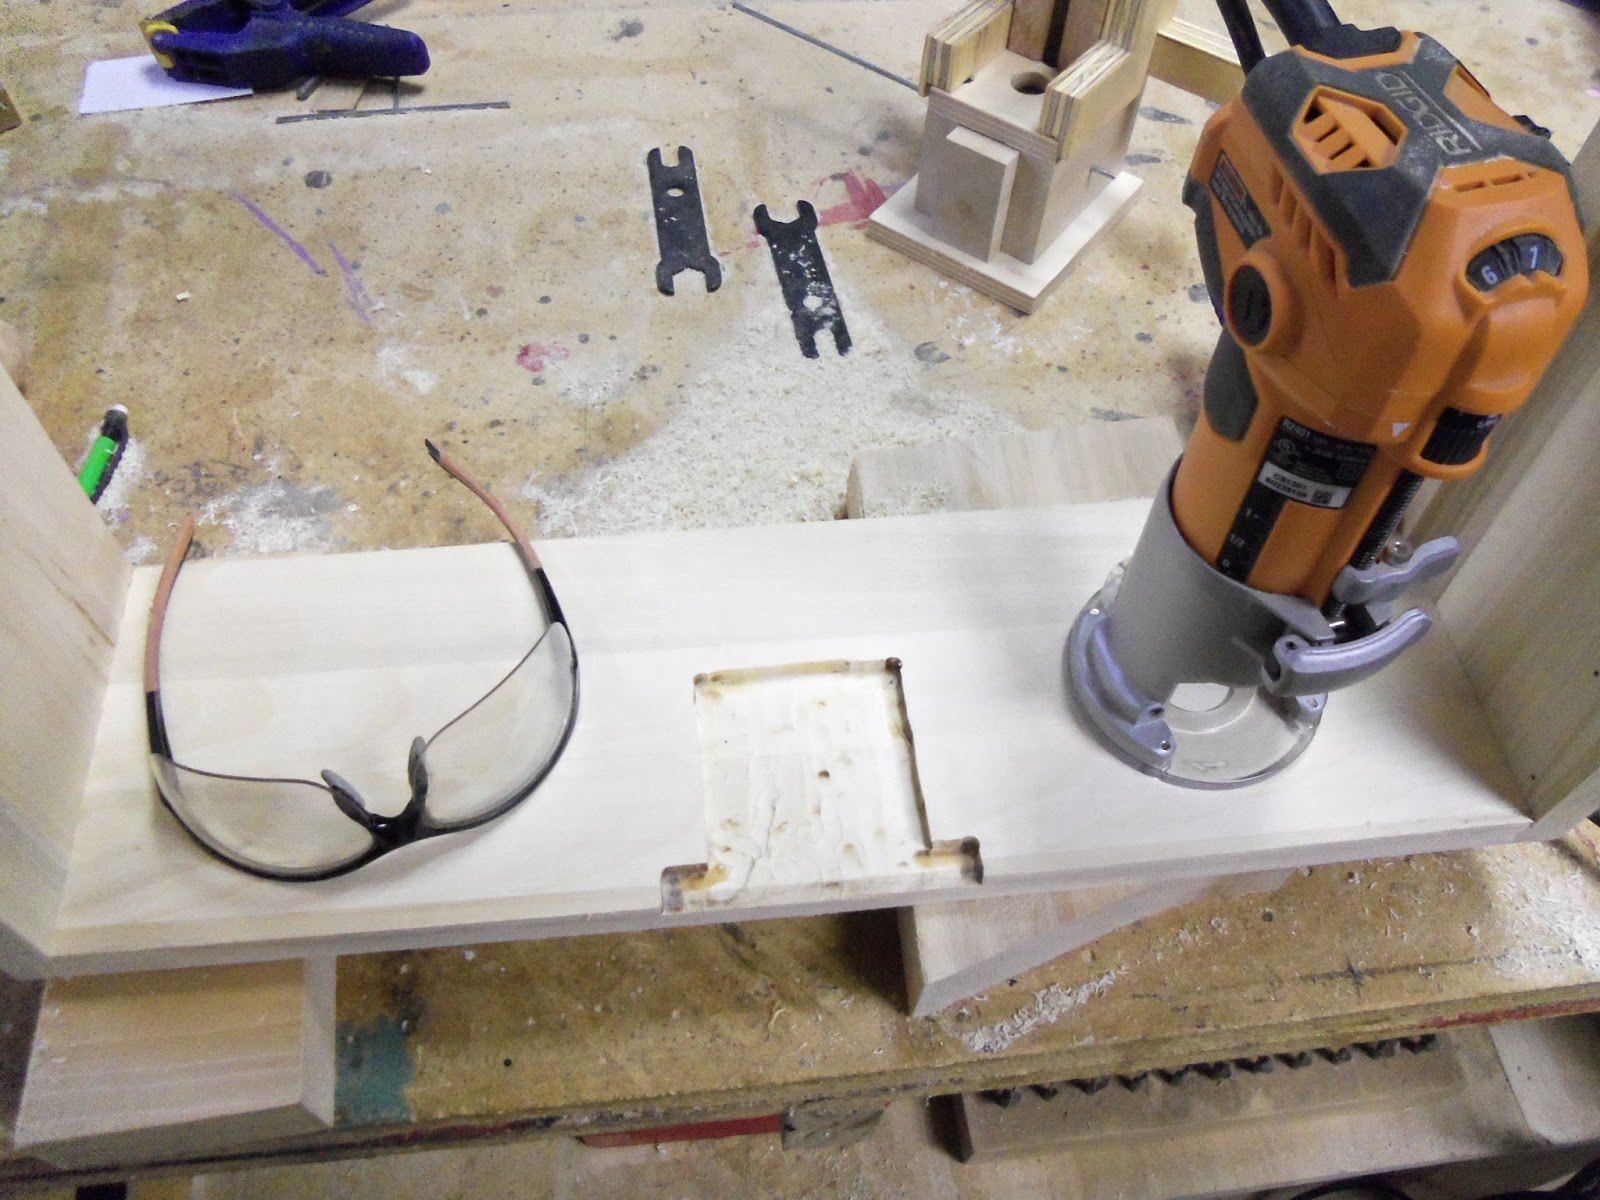
In order to allow the elevator column to sit flush with the back of the base, you have to inset the pump assembly into the back of the base. The easiest way to do this in my opinion is a spiral bit in a palm router.
Then the center of that inset has to be removed to allow the slider in the pump assembly room to move in and out. It extends out almost flush with the outside of the back of the box. You could drill some holes and use a chisel to remove this material. To me though, it's easier just to put it on the scroll saw and remove it.
If you look closely you may notice I have removed more material than necessary. It will not harm the function of the machine, and it is on the back, so I'm leaving it. However, I thought I'd tell you the reason there is more removed than I originally intended. This was one of those cases where I should have marked my work before starting. I thought I'd eyeball it. This turned out not to be such a good idea. I cut right past where I needed to over to the far side of the recess area. I was almost completely done cutting when I realized what I'd done.
The recess allows the elevator column to be properly positioned against the back while still having room for a functioning pump.
The cutout allows the slider to come out far enough from the pump to be functional.
The bottom of the base is made of plywood. This allows me to use a solid piece for the bottom. I don't have anything in solid wood large enough for that. For stability I did not want to use glued up material for the bottom.
The bottom is attached with glue and eighteen gauge brad nails.
The pump assembly is screwed to the bottom of the base. If you remember, the elevator column is lined up with pins on top of the pump. Between the pins, the back, and the supports we will later put under the bottom of it, the elevator is assured to be in the proper orientation when the machine is in use.
 

Tuesday, April 9, 2013

Marble Machine Goes Modular - The Elevator Column


Yesterday we built the pump to handle pushing the marbles, but now we need to get them on some kind of upward mobility. Marble machines work from gravity and momentum keeping the marbles moving through it's course. So they have to start high. So today I built the elevator column. In this first photo, you see the elevator column sitting beside the pump.
I took a closer shot so you can see that we added pins to the top of the pump that line up with holes on the bottom of the elevator column. This assures the elevator gets placed in the exact location every time. If it did not, there is a good chance that marbles could get hung up.
Speaking of things getting hung up, after I built the elevator it was time to test the pump and elevator assembly. I test each and every part as it's built. Besides being fun, it is a necessity. It is best to catch any problems exactly as they arise instead of later having to isolate a single problem within a conglomerate of parts.

I realized I had a problem with the pump. It worked fine yesterday while feeding one marble at a time. Now though, with the elevator in place, I was able to try feeding a steady stream of marbles by setting up a temporary trough. It would take one marble fine, then would catch the next marble between the piston and lower part of the cover hole and jam up instantly. That just would not do. So I investigated the issue.
What I determined was that the piston was dropping down just a hair too low, allowing following marbles to drop down into the hole on top of the piston before the slider had a chance to move the assembly aside. This was like throwing a monkey wrench into a gear assembly. It simply caught in the sum of parts and jammed.
I thought about scrapping the pump and starting over. Before doing so though, I took a coffee break and thought of an easier solution. I used a micrometer and measured the difference between the marble at it's lowest point and the top of the slider assembly, and determined that it was only an eighth of an inch difference. So I sliced off an eight inch section of three quarter inch dowel on my table saw sled and carefully glued it in place flush with the bottom of the slider assembly.
Of course this required another extended coffee break while I waited for the glue to set up. I wasn't sure how it would work and kept thinking of an old saying I remembered from the Emergency Broadcast System, "this is a test, this is only a test". That scares me. I think I'm showing my age too much remembering these things and my kids haven't a clue what I'm talking about when I say things like that.

After the glue dried though, luckily, this fixed the issue and I could move on. We were cooking with grease now. Then I wasted about an hour just playing with the whole assembly. No, I don't play. It's testing. Yea, that's the ticket, testing.
So here is the whole assembly of the pump with the elevator column attached. As I showed with the pins earlier, the elevator column is removable. The reason for this is that later, when everything is done, the machine breaks down for all the parts to be stored in the base.
At the top of the elevator column is a turnout that directs the flow of marbles outwards, or inwards in this case, toward the base that all this will reside in. As the marbles reach the top and are pushed outward, the shape of this piece, along with the metal rod you see in the center of it, helps direct the marbles where they need to go.
Here was part of the "testing" process. I like how you can actually see the marbles as they rise through the elevator column.
Here is a closer view of it.
.
I got a message yesterday with a question about my using plywood on this machine and about the species of other wood I've been using.
Some people who know me or read my blogs know that I have a hatred for plywood. Whenever possible, I use nothing but solid wood. However, as much as I hate to admit it, plywood does have it's place. In some situations, such as the ones you'll see during the construction of this project, the stability of plywood just can't be matched with solid wood. Solid wood moves with weather changes. It doesn't matter what it may be sealed with. That movement is always present.
For example, you'll notice the base mount on the elevator column and the top and bottom of the pump  are plywood. This is a critical area where the placement of the parts always have to be perfectly the same as they were designed to be. In cases such as this, plywood allows the possibility to make it and rest assured that the wood will not move enough to make that future joining of parts a problem.
You'll see me using a variety of woods in this project, as I like to do in a lot of my projects. So far, except for the plywood, all the wood I've used has been sycamore. I chose it because it is a very stable wood for these moving parts. While it is not as stable as plywood, it has less movement with weather changes than some other wood choices I've tried in the past.
I will try to remember to state the species of woods I'm using in future installments of this build.


Monday, April 8, 2013

Marble Machine Goes Modular - The Pump

Today I started on a new marble machine. While doing the first three machines, I have gotten multiple questions through my email about what goes into these type machines. Well, so far, all of them I've done have been other's designs, the one I'm starting as well. However, I do tweak some things and do design changes as I see fit. That is all part of the fun.
Since I start getting questions after posting any of the machines though, I decided I wanted to do a daily blog on the build of this new one. I can't promise anything, but I will try my best to post every day that I work on it. In the case that I can't, I will take photos so I can catch up as soon as possible. So here we go.
 
The newest project is called a modular marble machine. It is a very interesting design because the elements of it are not fixed. After it is done, the final user can move pieces and build different designs by stacking blocks. It's much like a child's building block toys, but only cut and designed to allow marbles to move over, around, and through the pieces.
Before I get started, if anyone would like to read more about the machine, by the man who designed it, Matthius Wandell, here is a link the machine on his website. While you're there though, if you haven't seen his site before, check out some more of his designs. This will be the sixth project I have done based on his designs, and I must say, he designs some amazing things.
 
While working on something like this, I don't think it is written in stone to make the various parts in any particular order. So I usually work on whatever I feel like working on during a particular day. For this one, I decided I wanted to build the part of it that is most interesting to me, the pump.
As I said before, this machine is modular in design. You arrange the blocks to build any number of designs, limited only by ones imagination. To get the marbles started though, there is a hand crank operated pump that catches the marbles and "pumps" them up to the top, to be released upon the built tracks. I have now build machines with escapement mechanisms and gear lifts, but now something that operated like a pump, so this mechanism interested me greatly.
Here is the pump assembly. It is an open ended box. Inside is a crank shaft made from stiff wire that moved a slider back and forth, while at the same time moves a piston up and down. This grabs a marble from one hole, transfers it to the other hole, where it pushes up on the marble before it. Later, we will be building a shaft in which this pump will stack the marbles upwards for a steady stream of marbles on the tracks.
Here are photos of the actions of the pump.
There will be a feed trough that feeds a steady stream of marbles to the hole you see the marble in in this photo.
As you turn the crank, the piston will lower as the slider move towards the other hole, carrying the marble with it.
The marble comes out the other hole and the slider and piston move to catch the next marble from the first hole.
It catches the next marble same as the first.
Brings it under and over to the ejection hole.
And pushes the first marble upwards.
 
All of this will become more clear as we progress through the rest of the machine. If you're impatient and want to see a better idea of it now though, here is a video made by Mr. Wandell about the building of the pump. The video is close to twenty four minutes long, but it is worth watching if you are really interested in seeing exactly how the pump's inner workings operate. 

Sunday, April 7, 2013

Squaring Solution

If you read the last blog installment, you know I was having a problem squaring the pen blanks to the tube inserts. I don't like the barrel trimmers. The idea is a good one, but I just didn't like the performance of the one I have. So I had an idea for a different approach.
I have seen some jigs to be used with disk sanders. I have a disk sander. However, I keep course paper on it for another purpose in my shop. The disk sander idea would involve either setting it up with finer paper, which would slow me down when I use it to hog off material on some other projects I use it one, or constantly changing paper all the time, which is a major hassle. So, going on that general sanding idea, I had an idea to go a different route.
I have learned that, when wanting to get things perfectly square and concentric at the same time, there is no better tool for the job than the lathe itself. So my idea involved sanding the blanks square on the lathe.
Here is the tool. To make it I took a length of quarter inch steel rod. I chucked it up into the morse taper end of the pen mandrel set and used sandpaper with the lathe running to get it sanded down just a hair, so the seven millimeter tubes would slip all the way across snugly, but easily at the same time. Next I drilled a quarter inch hole into a small square of wood and used epoxy to glue it onto the shaft. Once the epoxy set, I turned the block of wood down round, and perfectly straight with the shaft. Then I took two pieces of sandpaper, eight grit and two twenty grit, and sandwiched them between two pieces of wood so I could use the drill press to put clean holes though the center. I then epoxied a piece of the paper to each side of the wooden block. 
This completed the tool. I also coated the outer edge of the rounded wood with CA glue. This wasn't absolutely necessary. I figured it would prevent some wood movement though. It couldn't hurt.
Now for using it.
The tool simply slips into the morse taper end chuck part of the pen mandrel. For the purpose I'm using it for, I found that simply hand tightening the chuck holds the tool plenty tight enough for what I need to do. You can flip the tool either way depending on if you wish to use eighty grit or two twenty grit. I'll usually use the finer grit. I figure if a blank is severely out of square, or extremely hard, I may have a need for the courser grit.
Then, with the lathe running at it's slowest speed, so you don't accidentally take off too much, slip the pen blank over the end of the shaft and touch it lightly to the paper. I suggest going slow and letting the abrasive do the work. This will assure a nicer finish on the end, extend the life of the paper, and taking your time allows you to keep a close eye on things and not sand too much away.
In the above photo, you see the back end of the pen I made yesterday with the gap in it. As a good test run, I decided to take a chance on the tool, since I was sure it would work, and fix the gap in this pen.
IT WORKED!

One Step Forward......

I have an opinion of wood working in general. If you're not constantly learning something new, then you're doing something wrong. I think that's what I'm enjoying so much about this wood turning. It always seems to be one step forward and two steps back in the learning process. I am consistently unhappy with the pens I've been turning. If I get to where I'm almost happy with the results, I add something new to the scenario to keep the learning curve high. That's the way I like it.
So anyway, I haven't been able to do nearly as much as I'd like in the shop during the past week. I just haven't been up to it. So I fiddle around as much as I can, and this post is simply the learning I've been doing lately.
This first pen is my latest attempt at a Celtic cross. It still isn't right, but I am getting closer. I understand the process now. The largest problem I'm having is gluing. I have been trying different glues and am having mixed results. I read online that a lot of people use quick setting glues and that is great. For me though, I think I need to move backwards and go back to a slower setting glue, like maybe Titebond II. I may go back with the quicker setting stuff later, but for now I think having more time to fiddle with the piece before everything is set will work better for me.
This pen was not a total waste though. My wife loves it. It is made of purple heart with box elder. So I let her have it. Who am I kidding? She can have anything she wants.
My other problem is what I worked on mostly this week though. I've been using a concoction recipe of finishes that produced some nice results, but I'm also looking for something more durable on these pens. The obvious solution, based on everything I've read, is CA glue. So I was determined to learn to consistently apply a CA glue finish.
The above pen turned out ok, but not great by a long shot. If you look closely just below the middle band, you'll see some ghosting effect. I think several things caused that on this particular pen. For one thing, I am trying several different thicknesses of glue. This one was my experiment with medium consistency glue. I have since learned that I have much better luck using the thinnest glue and applying multiple extremely thin coats instead of heavier coats. It's much like painting.
Anytime I learn something new, I try it on scrap wood before trying another actual pen. So after practicing on scrap, I moved on to my next pen where my next problem became apparent.
This pen is made of ziricote. It is a beautiful wood. I actually probably shouldn't have even been using this particular wood for something that I know I haven't gotten perfected yet, but I couldn't help myself. You see, a good friend sent this wood to me. In a box of a lot of other blanks, I had twelve blanks of this beautiful wood. Ever since I first laid eyes on it, I just have been itching to see what it looked like finished.
Working with thinner coats of glue, I was real happy with the finish on this pen. I was quite pleased with myself. Then I removed the pen blanks from the lathe and wasn't so happy anymore. Sometimes, I have a problem with the bushings sticking to the blanks when using a CA glue finish. If you look closely above the center band on this pen, you'll notice a chip. The bushings usually pop right off, but this is what sometimes happens in the process. It chips that glass like finish.
 
So after putting some thought into a solution, I came up with this. I took the tube from a pen I had messed up on. I used a tubing cutter and sliced it into three pieces. Then, after turning the pen blanks, I removed them from the mandrel and placed these thinner spacers on each end and in between the blanks. My thinking was that, with these being thinner, even if it chipped the finish it would be hidden on the ends by hardware instead of being visible on the sides.
I would love to tell you how great this brilliant idea worked. Unfortunately, I did not take something else into account when I came up with it.
The thin pieces of tubing allowed a tiny bit of glue to seep far enough between them and the blanks that it basically glued the blanks to the mandrel shaft. I won't even start to tell the story of what it took to get them off. It took about two hours and several ideas to get that little task accomplished without damaging the shaft. Luckily, I did not damage the shaft or the blanks. The short pieces of tubing went immediately into the garbage though, along with my great idea.
I told you I saved the blanks.
This is another piece of ziricote. I love how different pieces of this wood have completely unique appearances. It's hard to believe that this blank and the one from the previous pen looked identical before turning them.
So I turned to my best friend for a solution, Google. I read through a lot of ideas for not gluing the bushings to the pen blanks before I came across one that I thought would work and was simple enough to do consistently. The idea was to put wax on the bushings.
This is a cocobolo pen. The wax idea worked. I am getting more and more confident on my CA glue finish. Actually, I must admit that others I have talked to were right. Once you start to get the hang of this type of finish, it is easier, quicker, and looked better than any other finish I have tried. I still need practice of course, but this is my new pen finish of choice.
That brings me to my next problem.
If you look real close at this pen, it has a new problem, and it is something I am noticing more and more. It is just above the center band. Don't ask me how most of my problems happen at the center band, right where they're most visible. Things just have been working out that way for me. If you look just above the band on this pen though, you may notice it has a tiny gap. That is from the blank not being square to the tube when I started.
They make a tool to square the blanks to the tube called a barrel trimmer. I just don't like it. I have tried it. It didn't work good. I sharpened it. It still didn't work good. I think part of the problem is that I like hard woods. I have noticed that it works flawlessly on softer woods. When I try it on hard woods though, like cocobolo or purple heart, I always get chip out that looks worse than the gap. I need a better way. 
So I have a new brilliant idea to combat this problem. I hope to work on that soon and will show you my solution, whether it works good or not. The worst that can happen is I learn something new, and isn't that what it's all about?

Friday, April 5, 2013

The Forgotten Pens

My family and I took a small vacation. I'll bet no one knew I was gone. That's what I thought. Anyway, I've spent the last week trying to get back into things. The trip took a toll on me though and I'm having problems getting back up to speed. I am slowly getting there, but it seems that, between my health and the clock, there hasn't been enough hours in the day this past week to get anything done at all.
So, I just wanted to check things here before hopefully getting to the shop. I realized that, on the last day of shop time before leaving, I made some pens that I did not post. So, until I can get something new done in the shop to show, here they are.


Monday, March 25, 2013

My New Angular Pen Idea

I woke up this morning with an idea on my mind that has to do with angles. I couldn't wait to try it out. First though, I had to turn a pen blank I had already prepared that was sitting on the bench. I am not complaining. It was a cocobolo blank. I recently received ten cocobolo pen blanks and have thoroughly enjoyed turning them so far. It is a beautiful wood to work with.
This is cocobolo with satin gold hardware.
 
 
Then it was time to turn my idea into a reality. I enjoy these random ideas because you never know how they are going to turn out. I try not to talk about the fancy firewood I sometimes make. Yes, some of my ideas wind up in the fire place.
I am not saying this is a completely original idea at all. I'm sure that someone, somewhere, has tried it before. It's like I always say, there's nothing new under the table saw. I often have these wonderful ideas that I later realize I happened to have seen somewhere before and simply had tucked away in my subconscious.
Anyway, my idea was to play with some forty five degree angles. These are just the first two test subject. I have several more variations of this same general idea to try as well.
The blanks are walnut and pecan. One is a pecan square glued in between two pieces of walnut with matching angles drawn and cut from both sides. The other is just forty five degree cuts made to walnut and pecan and then glued up.
Here is how the blank on top of the above photo turned out. I really like this design and will be trying my other variations soon. This first trial piece made me start thinking of endless possibilities once I seen how straight angular lines make for nice flowing curves on turned pieces. Hey, I bet I could work this idea into some bowls somehow too.
This first one is walnut and pecan with gunmetal hardware.
Here is the bottom blank from the photo above. It is pecan and walnut with satin gold hardware. I think every variation of this I like more and more. So I glued up my next idea related to this before leaving the shop today. Just wait and we'll see how it turns out!